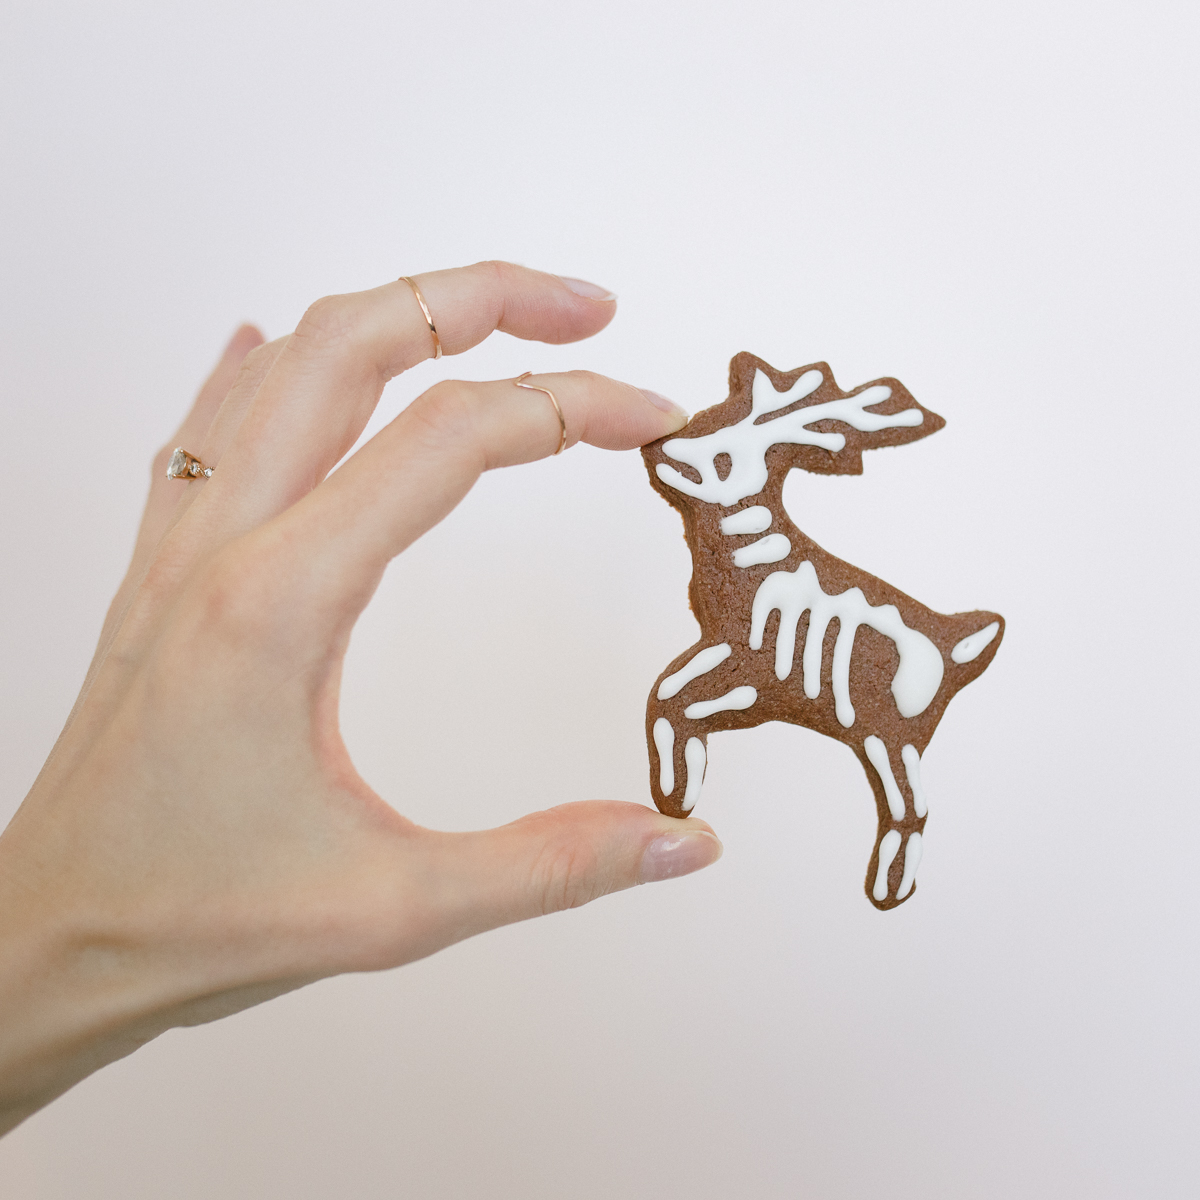
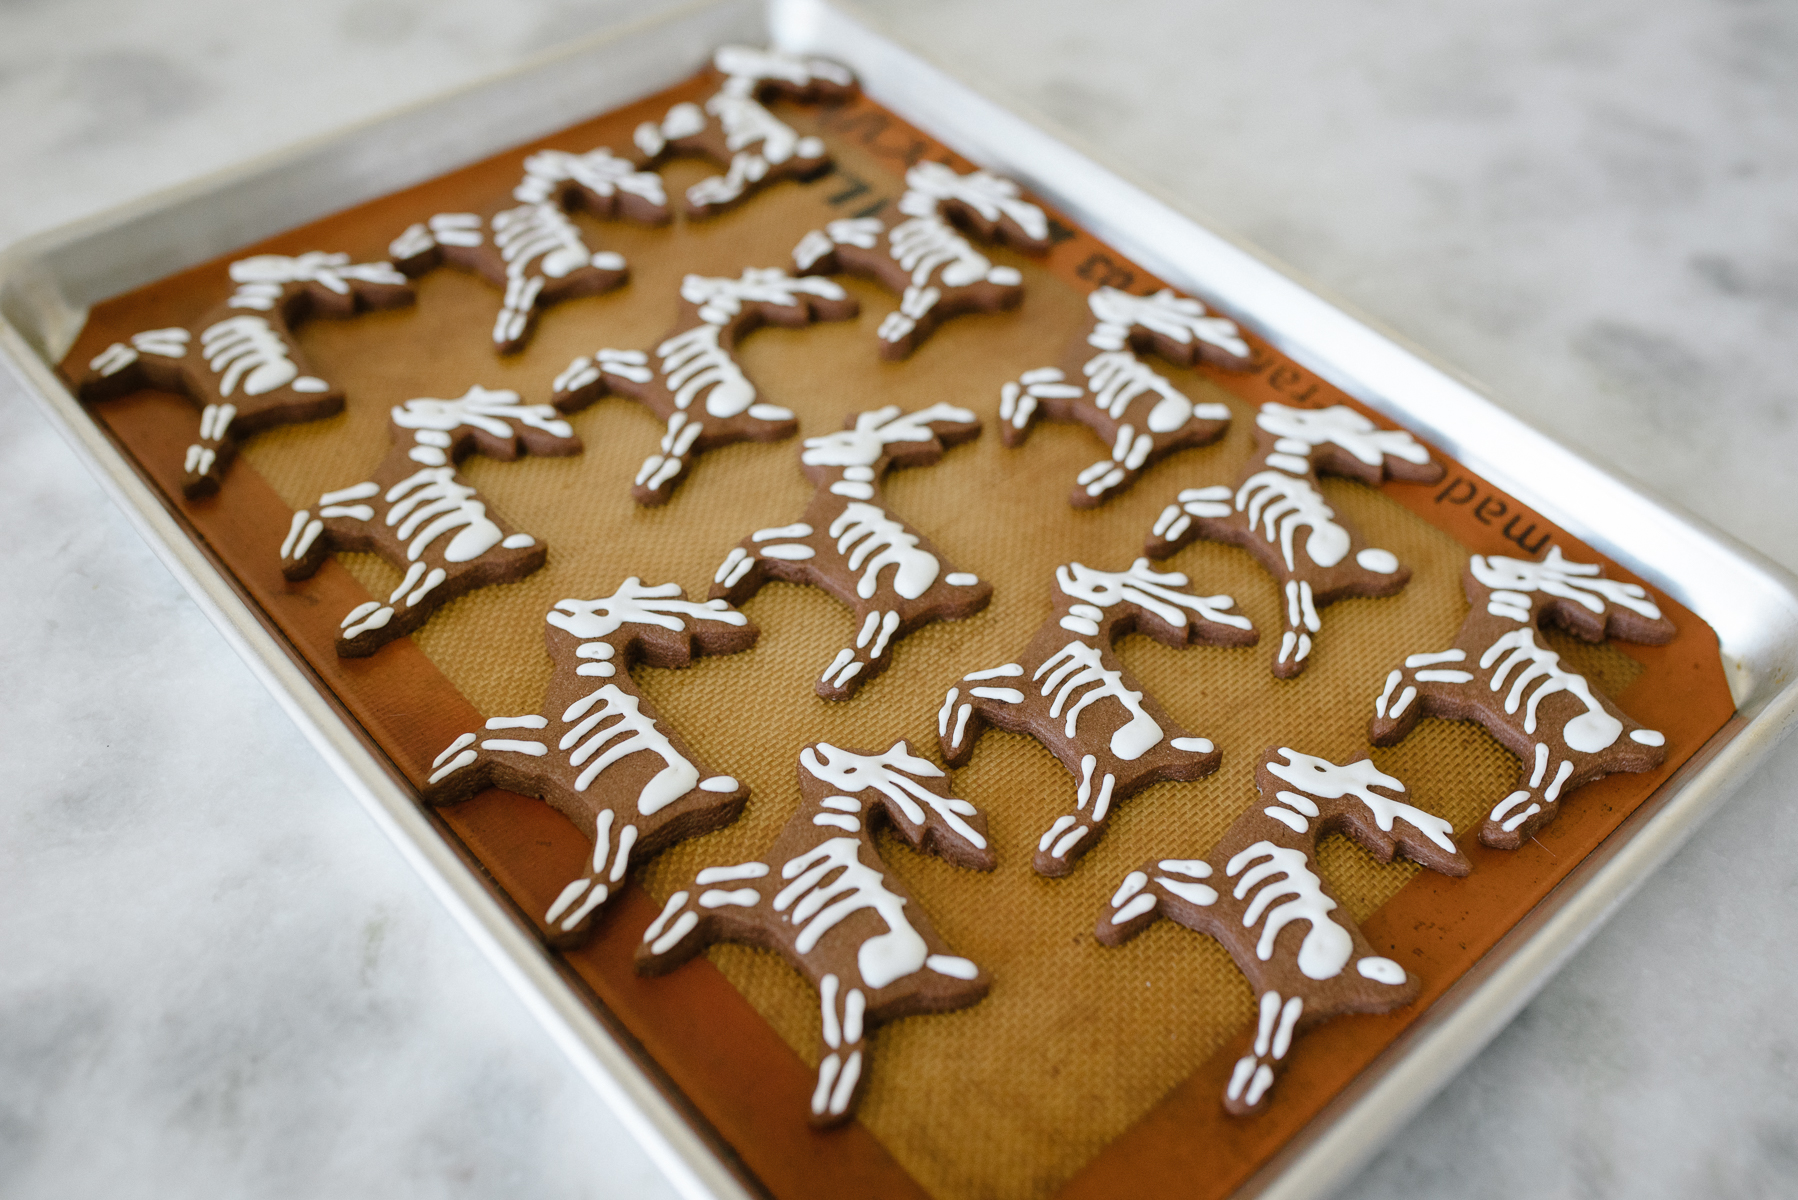
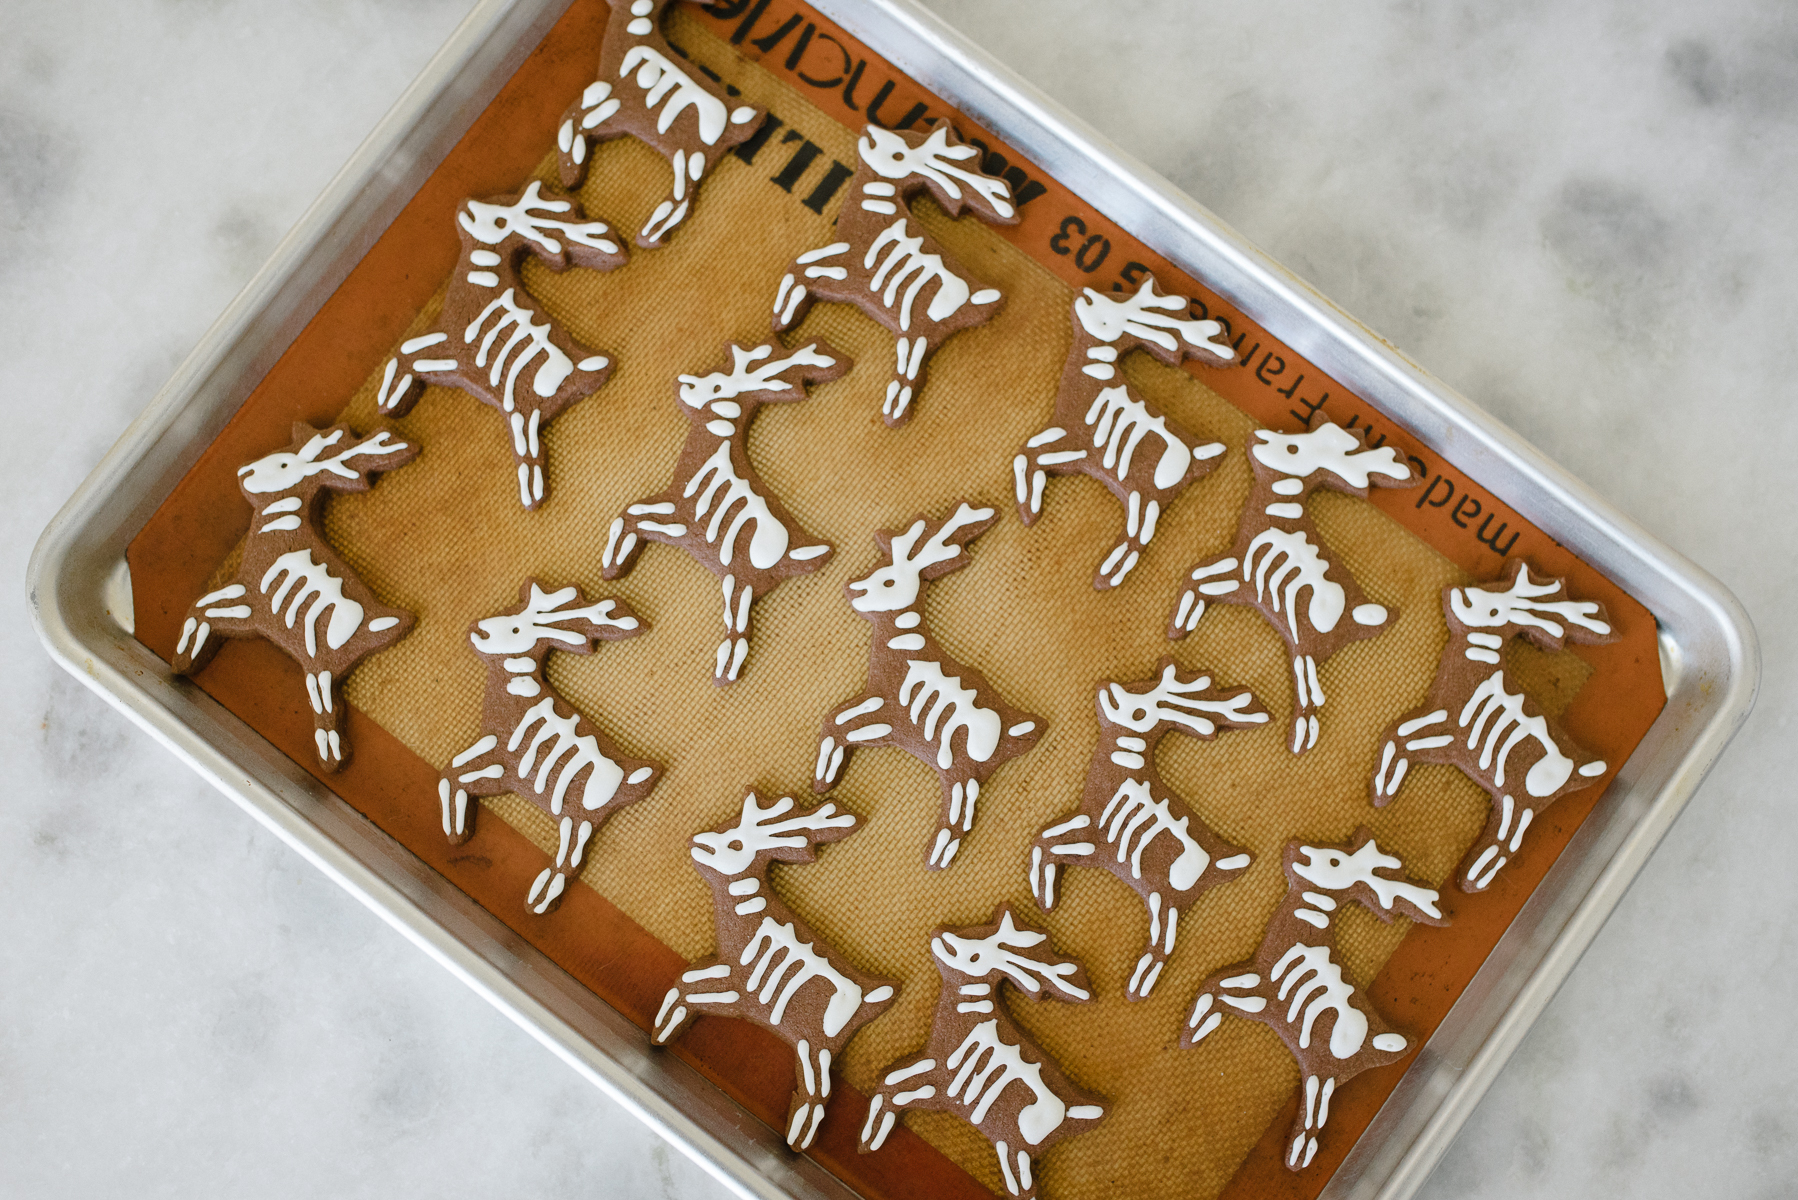
Well, hello there. Don’t mind the fact that I haven’t updated this blog since, oh, the pandemic upended everything. Nate and I are living in Colorado now, and while Halloween wasn’t so festive last year, we went all-out this year. We even made the cookies you see here.
The idea came up when we needed to make a dessert for a Halloween party we were headed to, only…we didn’t have any Halloween-themed cookie cutters. So we decided to make skeleton reindeer instead. Apparently skeleton reindeer are a thing in the movie The Nightmare Before Christmas, so I guess it makes sense?
I pieced this cookie together using recipes from two of my favorite bakers: Erin Jeanne McDowell’s Roll-Out Sugar Cookies (the chocolate version) and My Favorite Royal Icing from Sally’s Baking Addiction. I’m linking to them here and in the recipe card below because these are their recipes, not mine. (I do, however, list out the ingredients because I made a couple tweaks to Erin’s recipe and halved Sally’s recipe.) I also have some insights after preparing both recipes, so you’ll find those in the recipe card as well.
I’m anticipating a few questions from people who attempt to make these, so I’ll go ahead and answer ’em.
Where do you buy meringue powder?
Meringue powder is a really helpful ingredient for whipping up egg whites to make, well, meringue. It’s also a popular ingredient in royal icing recipes because traditional royal icing is made by combining egg whites and sugar. Swapping in meringue powder cuts out a bit of the salmonella risk. Anyway, I’ve found that the craft store Michaels is the best place to score meringue powder. (Just head to the baking section!) Amazon also seems to have a lot of options, so you can check there too if you’re willing to wait for shipping.
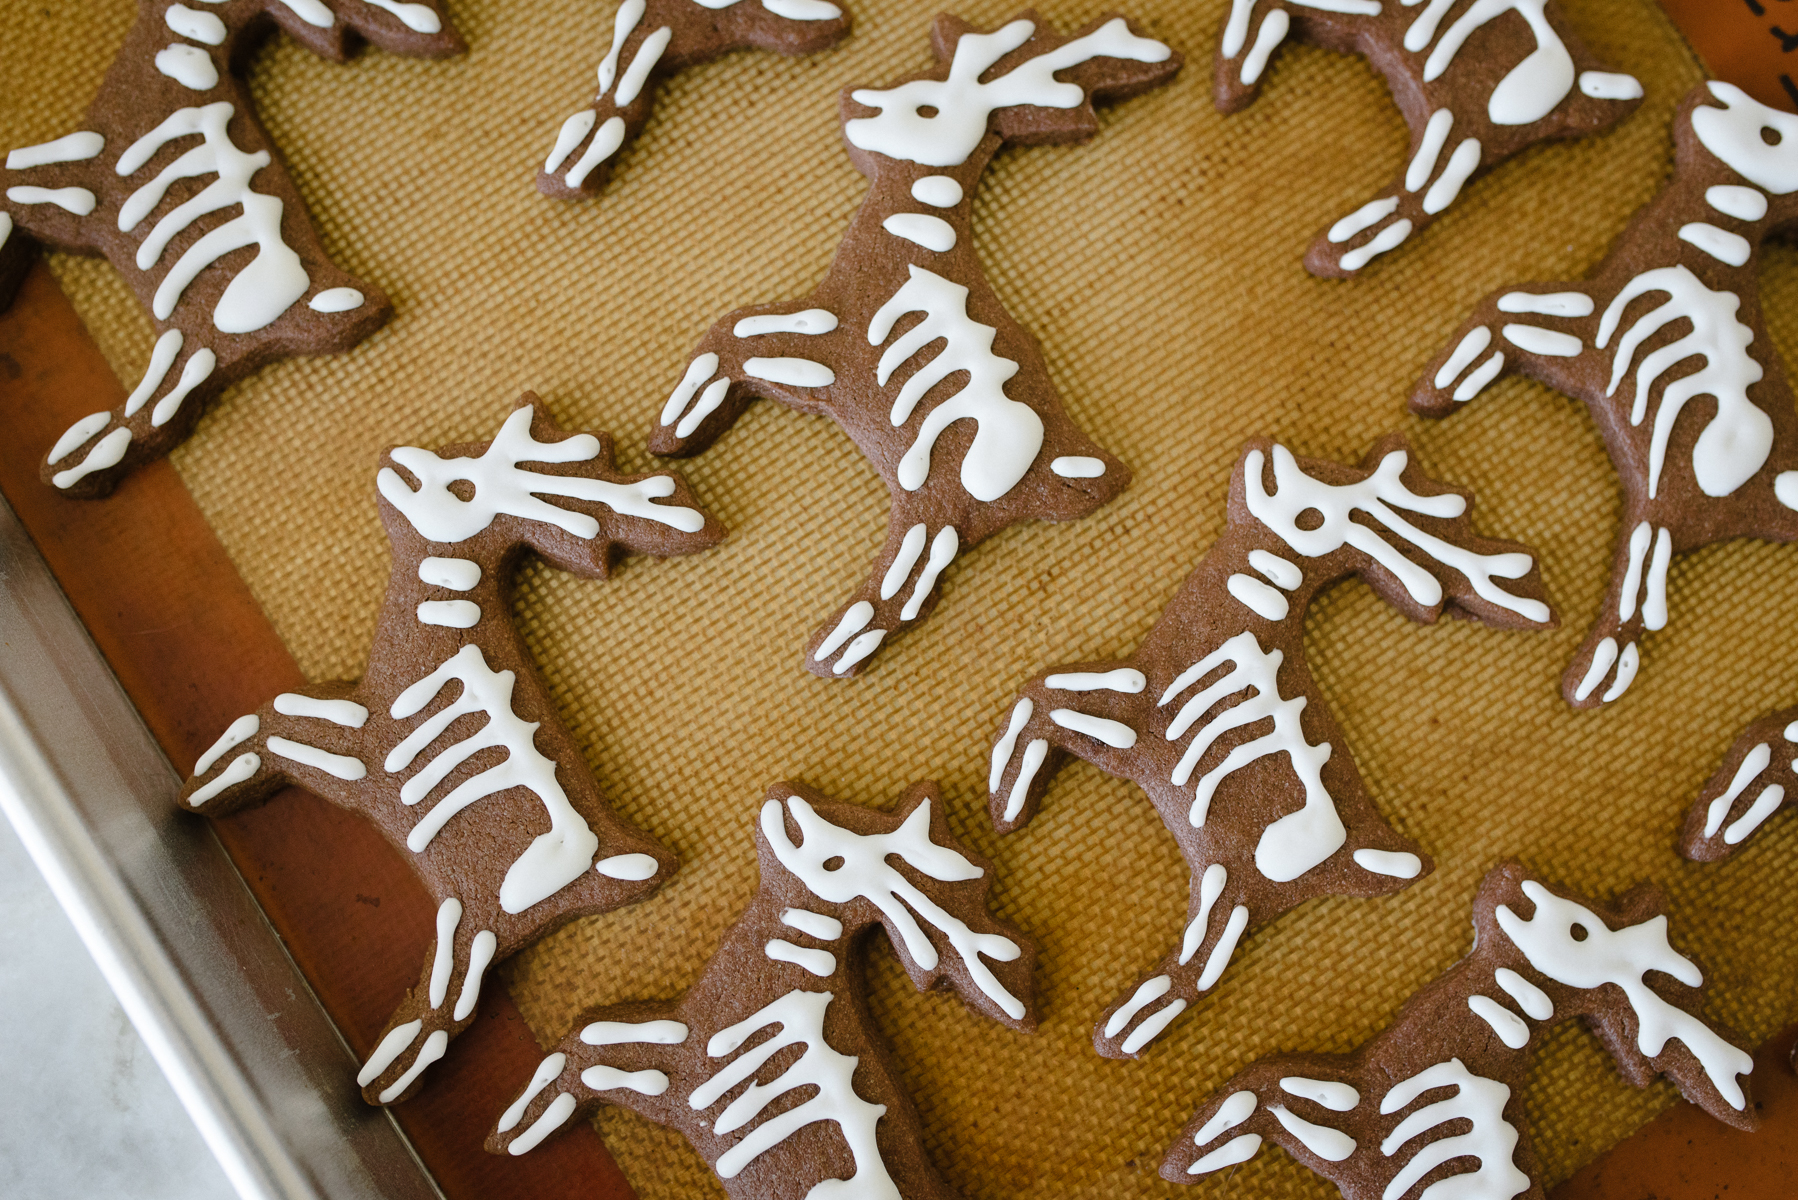
How do I pipe royal icing neatly?
Piping designs with royal icing is a little tricky if you’ve never done it before. A few tips:
- Consistency, consistency, consistency. You want something that holds its shape, but also “floods” and smooths out a little after piping. Sally of Sally’s Baking Addiction does a really great job of explaining what to look for here. For these skeleton reindeer cookies specifically, I would err on the thick side.
- Use the right tools. Piping tips are your friend here. I used a reusable Wilton piping bag (you’ll want a smaller size such as a 12-inch for this) with a Wilton #3 round tip (though I think a smaller #2 tip would have been great as well). Disposable piping bags would also work great, and if you don’t have any piping tips, you can always cut a tiny bit off the end to create a makeshift piping tip. I also had a handy little decorating tool like this handy, so that’s what Nate used. (Mine is from the brand Joie, but they must not sell it anymore!)
- Wipe off the tip every now and then. Sure, icing may be coming out of your piping tip, but that doesn’t mean it has to go on your cookie! If this is happening and you’re not ready to pipe, just wipe the icing off the tip until you’re ready to start icing. (It helps to keep a towel handy.)
- Pop bubbles with a toothpick. As soon as you’ve finished piping your design, use a toothpick to pop any bubbles you see. If you work quickly enough, the icing will still be a little runny and fill in the hole left behind.
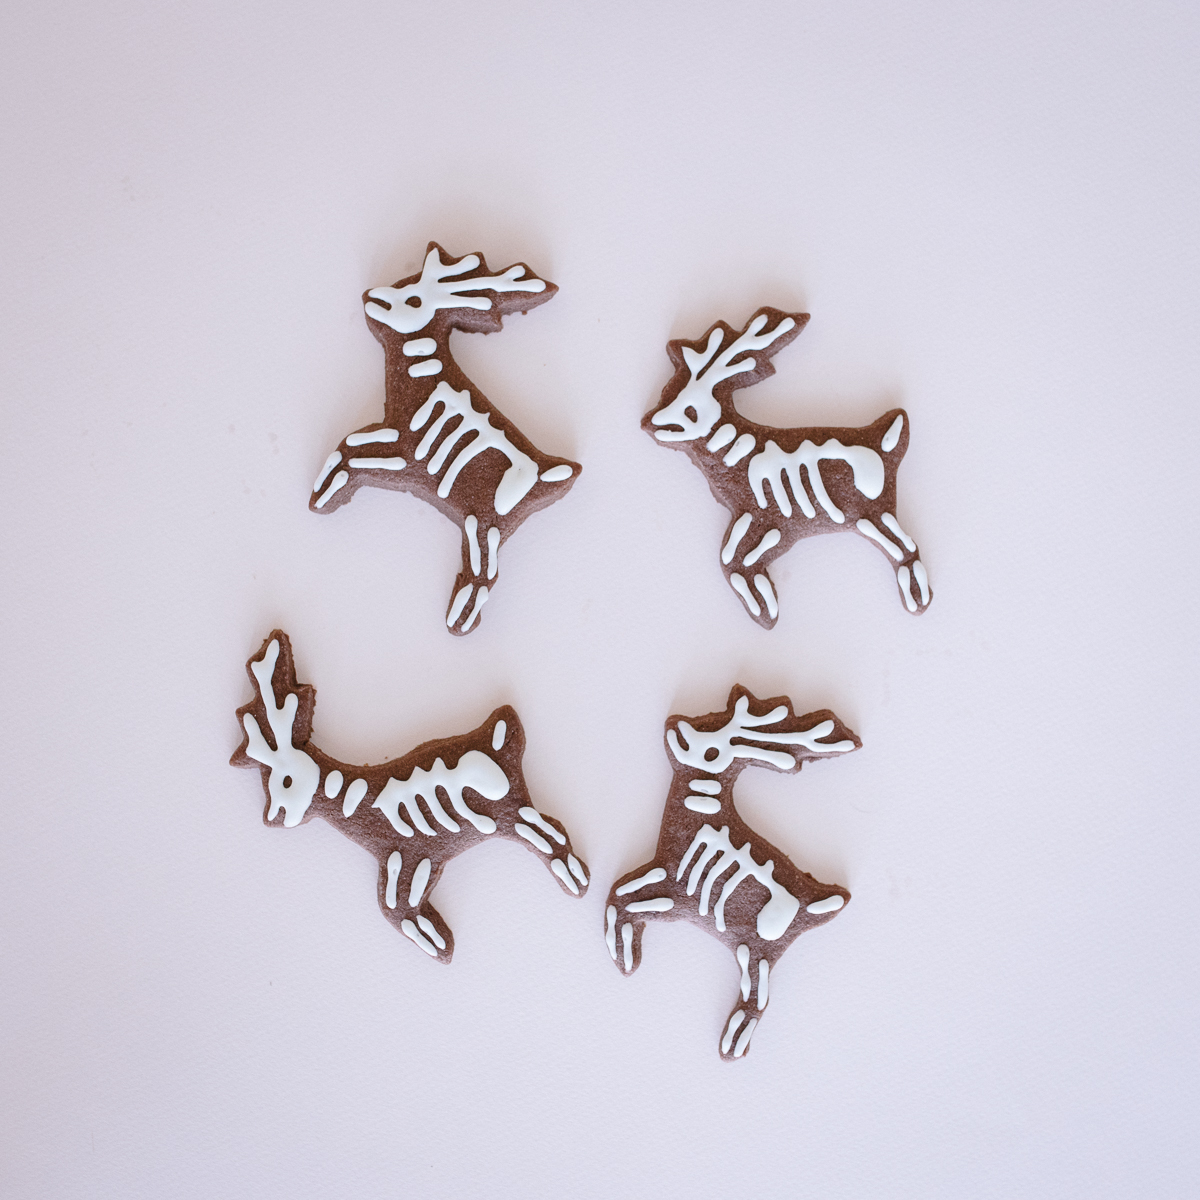
Chocolate Skeleton Reindeer Cookies
Ingredients
- For the cookies
- 2 ¾ c (330 g) all-purpose flour
- ½ c (42 g) cocoa powder
- 1 ½ tsp (6 g) baking powder
- ¾ tsp (3 g) salt
- ¾ tsp (2 g) cinnamon or spice of your choice
- 2 sticks (226 g) unsalted butter, room temperature
- 1 c (200 g) granulated sugar
- 1 (57 g) large egg
- 1 tsp (5 g) vanilla extract
- For the royal icing
- 2 c (240 g) powdered sugar
- 1 ½ TB meringue powder
- 4–5 TB water, room temperature
- ½ tsp extract of your choice (optional)
Method
- Prepare Erin McDowell's Roll-Out Sugar Cookies according to her instructions, but with three tweaks. First, go by the ingredients I have listed here. (I find that these cookies sing with a little extra salt and spice.) Second, roll them out to ¼-inch thick, not ½-inch thick. Third, bake them for 10 minutes and then let them cool completely on the baking sheet. (I found that this kept them pleasantly chewy, yet sturdy.)
- Prepare Sally's Royal Icing according to her instructions, paying close attention to her tips on getting the right consistency. For these cookies, I actually erred on the side of having slightly thick icing, and it worked great. Whether or not you use an extract is up to you. (That's my addition.) Can you imagine these with peppermint-kissed icing on top? What a dream.
- Icing time! I'm sorry to say I didn't document the icing process for these, but I can walk you through your first cookie. (Use my pics as a reference—you've got this!) Start by drawing the tail and pelvis (the bean-shaped bone). Then, draw a line for the spine, starting from the pelvis and going towards the neck. Draw three little notches above the spine, followed by four ribs down below. (The ribs look more realistic if you curve them a bit.) Draw four lines on each leg, then two lines on the neck. Draw the skull, being careful to leave an open spot for the eye. (This part is the trickiest—just do what feels natural to you.) Draw your antlers and bam—you've just impressed yourself with your icing skills.

